6 Important Yoga poses for shoulder pain:-
In today's modern era, the body suffers a lot
of stress. The most stress-prone limbs are your shoulders due to everyday busy
urban lifestyles. Man's physical body is like a moving device that remains
active throughout the day, moving around and collecting food. All body parts
continue to do some work. Still the struggle does not end here, we sit or drive
in the car to go to work, sit in front of the computer all day, eat our lunch
sitting at our desk, then at home He also comes and sits in front of the TV, as
a result of which our shoulders swagger, and gradually become stiff. The right
shoulder usually suffers more.
Other causes
of shoulder pain include:
• Shoulder pan has
become a common problem nowadays due to arthritis.
• torn cartilage
• torn rotator cuff
• swollen bursa sacs or
tendons
• bone spurs (bony
projections that develop along the edges of bones)
• pinched nerve in the
neck or shoulder
• broken shoulder or arm
bone
• frozen shoulder
• dislocated shoulder
Does yoga help with shoulder pain?
In the modern sedentary lifestyle, one has to
sit in a chair all day, which causes the shoulders to become strained and the
shoulders tense. As a result, anxiety and negative feelings converge here. So
what kind of activities help defrost these stiff shoulders? Does yoga help with
shoulder pain?
Absolutely!
There is no doubt that Yogasana helps to relax the muscles of these shoulders
and relieve tension. Yogasana relaxes not only the shoulders but also the neck
and upper back. It would be better to practice yoga continuously for shoulder
pain and it should be learned properly under the direction of a yoga teacher.
Whatever part of this will cause pain, yoga gurus will suggest special posture
especially for that part
Several
important postures of the Yoga Poses For Beginners series can provide relief in
shoulder pain. We request you to practice the 12 important postures given in
this series.
Which yoga is best for shoulder pain?
1. Virabhadrasana | Warrior pose
· 1 . To perform
Veerabhadrasana-3, first of all, spread a yoga mat in a clean place and stand
upright on it.
· 2. To do this asana, you can
also stand in the posture of Tadasana.
· 3. Now keeping both of your
legs straight, tilt your upper body downwards and try to keep both your hands
on the floor.
· 4.For this you can also take
recourse to uttanasana mudra.
· 5. With both hands on the
floor, raise your left leg and try to straighten the back.
· 6. After this, slowly raise
both your hands.
· 7. Move your torso, ie the
upper body, and bring it parallel to the floor.
· 8. Now straighten both your
hands and bring them parallel to the ground.
· 9. In this position, both your
hands, torso (upper body) and feet will be in a straight line.
· 10. Balance your right foot and
try to remain in this posture.
· 11. While in this posture, take
5 to 6 breaths and come down to your initial position while keeping your feet
down.
· 12. Now repeat the same process
with the other leg.
What are the benefits of warrior pose?
·
Strengthens hands, feet and
waist.
·
Increases balance in the
body, increases tolerance.
·
It is very beneficial for
those who sit and work.
·
Very effective in shoulder
tightness.
·
It is very beneficial yoga
for shoulder pain
·
Immediately relieves
shoulder tension.
·
Increases courage, grace and
peace.
2. Downward Facing Dog (Adho Mukha Svanasana)
How do you do a downward facing dog for
beginners?
· First of all, stand upright on the ground and
then with both hands forward, bend down towards the ground.
· While bending, your knees should be straight
and should be just below the hips, while both your hands should not be equal to
the shoulders but bend a little before that.
· Spread the palms of your hands forward in the
bent position and keep the fingers parallel.
· Exhale and bend your knees in the shape of a
slight bow and lift the ankles above the ground for a downward Schwannasana
posture.
· At this point, pull your hips enough from the
pelvis and press slightly towards the pubis.
· Keep the hands fully stretched from below the
shoulders on the ground, but the fingers should be spread on the ground.
· After this, bend your knees slightly on the
ground and raise the hips as high as possible.
· The head should be tilted slightly towards
the ground and be in line with the back. Now you are completely in a downward
facing dog pose.
What are the benefits of Adho Mukha Svanasana
This helps to stretch the body and strengthen
all the parts.
- Legs, shoulders and arms are strengthened.
- Back pain is relieved.
- This yoga is beneficial to remove headache, insomnia problem
and fatigue.
- People who are suffering from mental
problems like anxiety, anxiety and depression, they should practice it daily.
3. Crocodile Pose (Makarasana)
How do you do crocodile pose [Makarasana] ?
·
Lie on your stomach, chin (chin), chest and
stomach are touching the ground.
·
Make the distance between your legs equal to
your yoga mat.
·
Now lift your head and bring both hands to
the cheek and make a cup shape.
·
Slowly bring both the legs up towards your
hips and then slowly move down.
·
It was a cycle.
What are the merits of Makarasana?
For shoulder pain: It provides relief in
shoulder pain.so it is very important yoga for back pain
For the spine: This is the best yoga practice
for the spine. Keeping this entire spinal cord healthy
Back Pain: This is a great yoga practice for
back pain. With its regular practice, you can get rid of back pain forever.
For Depression: By practicing this asana you
can overcome depression to a great extent.
To relieve tiredness: It is very beneficial
in removing tiredness.
In this way you do ten cycles.
4. Cobra Pose (Bhujangasana)
What are the steps of Bhujangasana?
·
Lie flat on the ground, keep the padanguli
and head straight on the ground.
·
Keep feet straight, feet and ankles also
together.
·
Keep both hands equal to both shoulders, and
keep both elbows near and parallel to the body.
·
Taking long breaths, gently raise the
forehead, then the chest and later the stomach. Keep the navel on the ground.
·
Now, with the support of both hands, lifting
the body up, pull it towards the back of the waist.
·
Observe: Maintain equal weight on both arms.
·
Inhaling with reflex, straighten both hands
while slowly turning the reed joint even more; Look up, raising the neck.
·
Consider: Are your hands away from your ears?
Keep your shoulders relaxed.
·
Elbows can also bend if needed. You can learn
to give the back more curvature by keeping the elbows straight, by continuing
the exercise as you go.
·
Keep in mind that your feet are still
straight. Keep a light smile, take long breaths and smile Bhujang.
·
Tighten the body according to your ability,
too much folding can cause harm.
·
While exhaling, first slowly bring the
stomach, then the chest and later the head back to the ground.
What is the benefit of Bhujangasana?
·
Relaxing yoga for shoulder and neck pain
·
Strengthening the abdominal muscles.
·
Reinforcing the entire back and shoulders.
·
Making the upper and middle parts of the
spine more flexible.
·
To get rid of fatigue and stress.
·
Extremely beneficial for asthma and other
respiratory diseases (do not use this asana when an asthma attack continues).
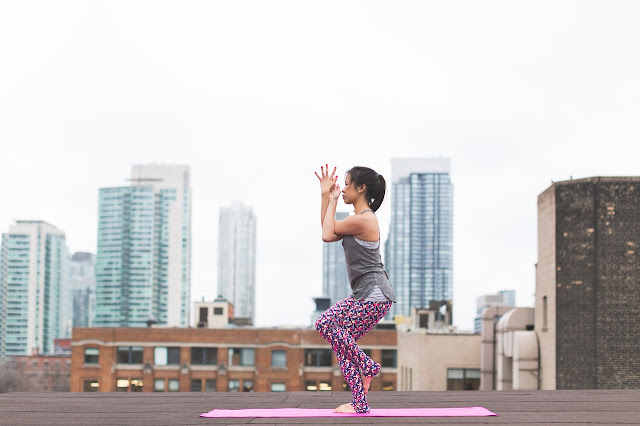
5. Garudasana | Eagle pose
How do you do Garudasana?
·
First you stand upright.
·
Move the right foot from the top of the left
foot to the other side. If your thigh is thick, you may have trouble doing it
first. On the other hand, those with thin waist and thin thighs can easily
practice it.
·
Make the arms interlock like each other.
·
Keep the interlocked hands in front of the
chest like the thong of a eagle. Balance by bending the knee.
·
Do this by moving the left foot over the top
of the right foot.
·
It was a half cycle.
·
Then do it from the other side.
·
Now a cycle happened.
·
In this way you do three to five cycles
What are the benefits of eagle pose?
·
For shoulder strengthening: It makes your
shoulders strong and relieves shoulder pain.
·
Peace in mind and body: The practice of this asana
brings peace in mind and body and maintains harmony in the body.
·
Reduces testicles: Its regular practice can
prevent testicles from growing.
·
For strengthening the feet: It makes the legs
and thighs strong.
·
To make the anus healthy: With its regular practice
it has been found useful in patients with anus, rectum, and bladder.
·
Beneficial for the knees: It increases the
activation of joints, relieves pain of knees, feet and joints.
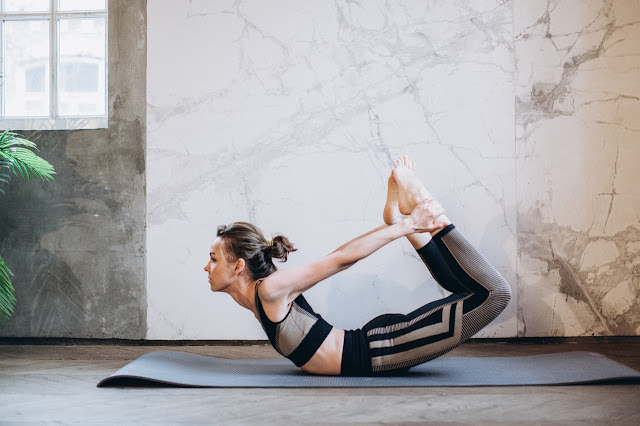
6. Bow Pose (Dhanurasana)
Performing Dhanurasana strengthens the chest,
thighs and shoulders. It is very important yoga
for shoulder pain
This posture makes the reed bone strong and
flexible. Relieves normal back pain.
Dhanurasana strengthens the digestive system
of the body. Complicated diseases related to stomach such as acidity,
indigestion gas, sour belching and general abdominal pain are overcome.
How do you do a beginners bow pose?
·
First of all, choose a clean and comfortable
place, after that sit on a mat. (Note - Any posture is more beneficial than
doing open air posture.).
·
To start Dhanurasana, first of all lie on the
mat. Then apply your chin (Chin) to the ground. Put both your hands in the
direction of the feet and keep them on the ground near the waist. The palms of
your two hands (Palms) should be bent towards the sky.
·
Now forward, raise both legs up by kneading
both your knees. When both the feet of your feet come to both the hips, then
with your hands, hold the ankles of both feet.
·
Remember that while holding the ankles of the
feet, the hands should be straight with both elbows.
·
Now slowly take a deep breath inside the body
and pull both your legs backwards. And at the same time try to raise both
thighs and hips above the ground. (Note- inhale even while raising the hips).
·
When you are raising both thighs and hips
above the ground, along with that, keep your chest and neck also above the
ground.
·
When the chest is fully elevated, then try to
move your uplifted neck as much as possible. (Nore- Do not try too much as you
start having neck pain).
·
Try to stay in this posture for as long as
possible (ten to twenty seconds). After that, bring the hips and thighs slowly
towards the ground. And also bring the front part of your body, ie chest and
head, to the ground.
·
Now free the ankles held by both hands and
keep the hands in the same position as they were while starting the posture.
·
Slowly straighten both bent knees and place
both feet on the floor as before. (Note- When you are getting free from
Dhanurasana posture, that is, bring the head, chest, thighs and hips down to
the ground, then the breathing is to be released outside the body.).
·
In the end, he kept taking it for a while.
And start the second set when fatigue is away. And after doing three sets, rest
in "Savasan".


1 Comments
Got some wonderful knowledge from this post. I got some great information from the article you have published in this post. Keep Posting . Hip Pain Clinic Mesa Az
ReplyDelete